V3 シリーズ製品共通インストールガイド(Win/Mac)
目次
■Windowsをお使いの方向け
■macOSをお使いの方向け
Windowsをお使いの方向け
1.「Piapro Studio」と「Mutant」のインストール
ダウンロードしたインストーラの圧縮ファイルを、任意の場所に解凍(展開)します。
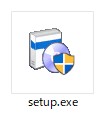
解凍によって生成されたフォルダの中には、「Piapro Studio」ならびに「Mutant VSTi」のインストーラがそれぞれ用意されています。「Crypton Software Installer (64bit)」フォルダ内の「setup.exe」を起動することで、インストールが開始されます。
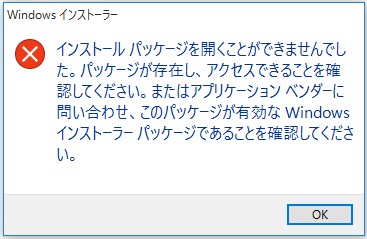
「インストールパッケージを開くことができませんでした。」というエラーメッセージが表示される場合、圧縮ファイルの解凍(展開)が正しく行われていません。
こちらのFAQをご参照の上で、正しく解凍を行ってからファイルを実行してください。
Mutant VSTiについて
「Mutant VSTi」は、サウンド素材管理のためのソフトウェア「Mutant」のVSTiバージョンです。「Mutant」について詳しくは、特設ページをご覧ください。
SONICWIREボーナスサンプルについて
「Mutant VSTi」をインストールすると、「SONICWIRE」で配信されている楽曲制作用サウンド素材集(サンプルパック)から抜粋した「SONICWIRE ボーナスサンプル」が、Cドライブ直下の「soundroot」フォルダにインストールされます。
インストール手順
-
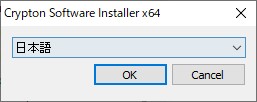
「setup.exe」を起動すると、言語の選択画面が表示されます。「日本語」を選択し、[OK] ボタンをクリックします。
-
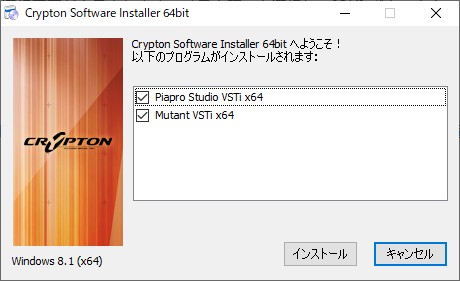
「ようこそ Crypton Software Installer へ!」画面で、「Piapro Studio」と「Mutant VSTi」の両方にチェックを入れ、[インストール] ボタンをクリックします。
-
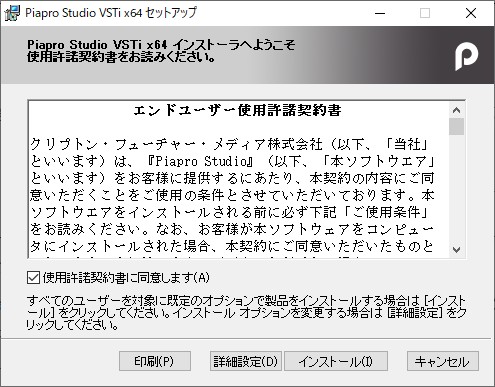
「エンドユーザー使用許諾契約」画面で、使用許諾契約の内容を確認します。「使用許諾契約に同意します」にチェックを入れ、[インストール] ボタンをクリックするとインストールが開始されます。
-
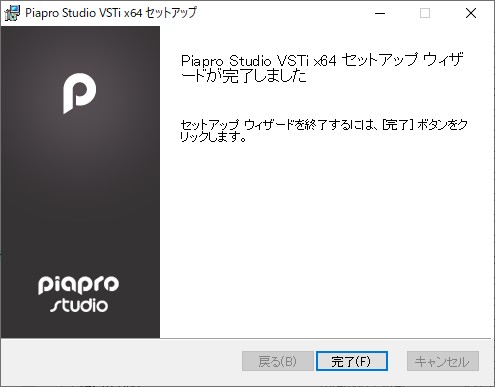
「Piapro Studio VSTi セットアップウィザードが完了しました」画面で [完了] ボタンをクリックします。
-
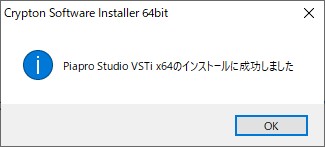
「Piapro Studio VSTi のインストールに成功しました」画面で [OK] ボタンをクリックし、「Piapro Studio」のインストールを完了します。
- 続いて「Mutant VSTi」のインストーラ画面が表示されます。手順3~5と同様の方法で「Mutant VSTi」もインストールします。
-
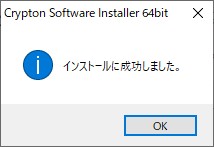
「インストールに成功しました」画面で [OK] ボタンをクリックし、インストールを完了します。
2. VOCALOID API/音声ライブラリのインストールとアクティベーション に進みます。
2. VOCALOID API/音声ライブラリのインストールとアクティベーション

音声ライブラリ(『MEIKO V3』など)は、以下の各フォルダ内にあるインストーラ「setup.exe」よりインストールします。インストーラを起動し、下記の手順で導入をお進めください。
音声ライブラリのインストーラ・フォルダ名
- 『MEIKO』の場合:「MEIKO V3 Installer」
- 『KAITO』の場合:「KAITO V3 Installer」
※以下の手順は『MEIKO V3』を例にご案内しますが、『KAITO V3』も同様の手順でインストールいただけます。
-
言語の選択画面
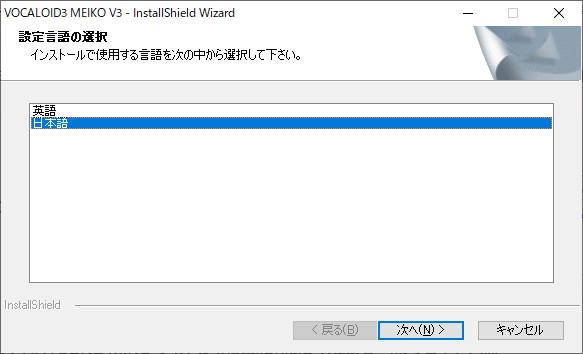 「日本語」を選択し、[次へ] ボタンをクリックします。
 -
「使用許諾契約」画面
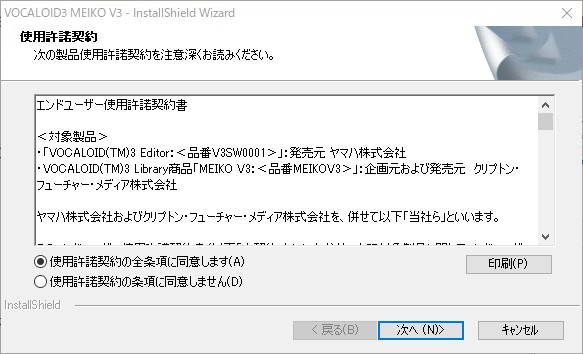 使用許諾契約書への同意をたずねる画面です。内容をご確認の上、「使用許諾契約に同意します」にチェックを入れ、[次へ] ボタンをクリックします。
 -
「VOCALOID API Runtime (32bit) 用の InstallShield ウィザードへようこそ」画面
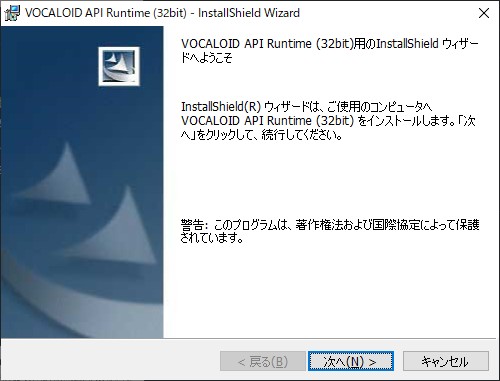 「VOCALOID API Runtime (32bit)」のインストーラが自動で起動しますので、[次へ] をクリックします。64bit 版 Windows をお使いの場合も、そのままインストールを続行します。
 -
「インストール先のフォルダ」画面
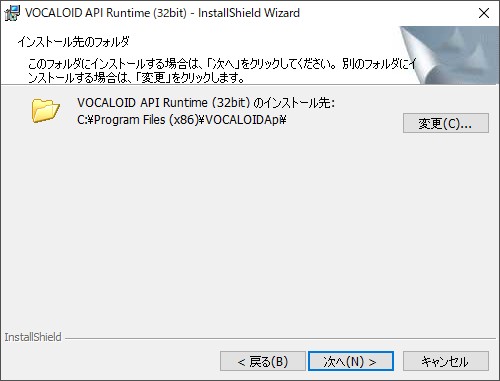 通常はそのまま [次へ] をクリックし、次の画面へ進みます。
 -
「プログラムをインストールする準備ができました」画面[インストール] をクリックすると、インストールが開始されます。
-
「InstallShield ウィザードを完了しました」画面
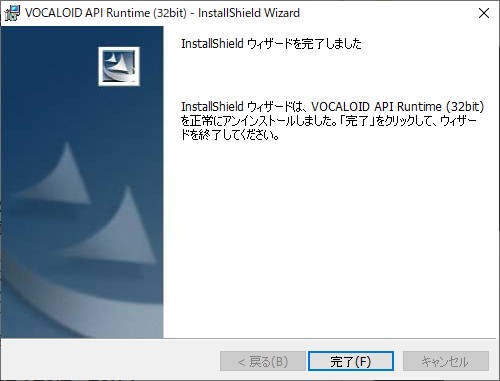 [完了] をクリックして「VOCALOID API (32bit)」のインストールを完了します。64bit 版 Windows をお使いの場合は、「VOCALOID API Runtime (64bit)」インストーラ画面が続いて表示されます。[次へ] をクリックし、上記の手順3~7の手順を繰り返す形でインストールしてください。
 -
「VOCALOID3 MEIKO V3 セットアップへようこそ」画面
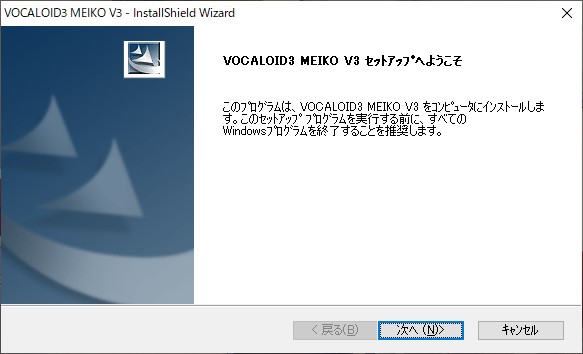 [次へ] をクリックします。
 -
「インストール先の選択」画面
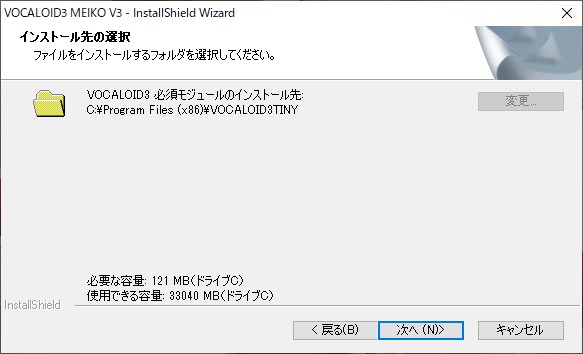 「VOCALOID 必須モジュール」(Tiny VOCALOID3 Editor)のインストール先を選択します。通常はそのままの状態で [次へ] をクリックします。
 -
「機能の選択」画面
 通常は全ての歌声ライブラリーにチェックを入れて [ 次へ ] をクリックします。
 -
「インストール先の選択」画面
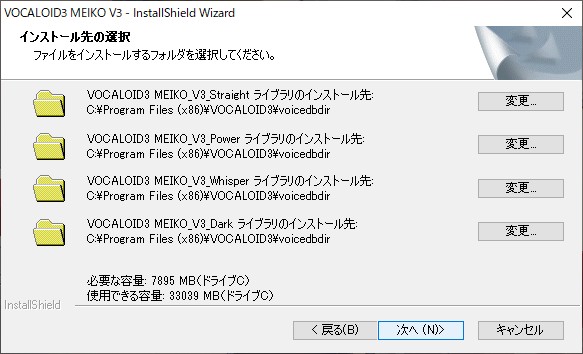
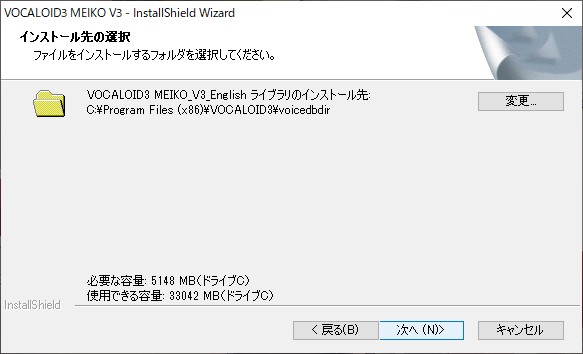 各歌声ライブラリーのインストール先を選択します。通常はそのままの状態で [次へ] をクリックします。
 -
「ファイルコピーの開始」画面
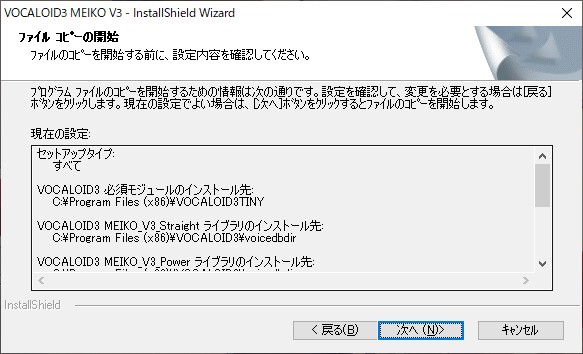 通常はそのまま [次へ] をクリックします。[次へ] をクリックするとインストールが開始されます。次の画面が表示されるまで今しばらくお待ちください。
 -
「VOCALOID3 をアクティベートしますか?」画面
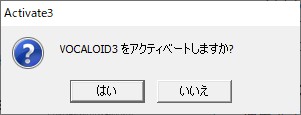 ファイルのインストールが終了すると、ソフトウェアをアクティベート(認証)するためのウィンドウが表示されます。[はい] をクリックしてアクティベート画面を開きます。
 -
「Select Language」画面「Japanese(日本語)」を選択して [OK] をクリックします。
-
「オンラインアクティベーション - Activate3」画面
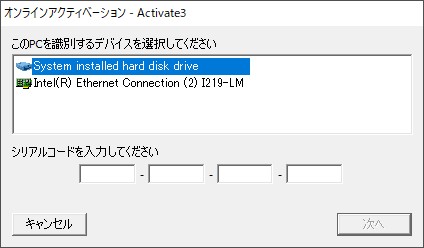 アクティベーションに使用するデバイスを選択し、画面下部に『MEIKO V3』のシリアルコードを入力して [ 次へ ] をクリックします。なお、アクティベーションを完了した後でデバイスを取り外したり交換したりすると、アクティベーションをやり直す必要があるのでご注意ください。
 -
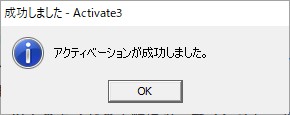
「アクティベートされるコンポーネント」画面
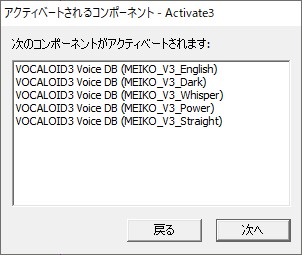 通常はそのまま[次へ]をクリックします。認証キーの取得に成功すると「成功しました」画面が表示されます。
 -
「InstallShield Wizard の完了」画面
 [完了] をクリックし、インストールを完了します。
以上で音声ライブラリと Piapro Studio のインストールならびにアクティベーションは完了です。製品に付属するDAWソフト「Cubase LE」、または「Studio One Artist」(2024年6月以前にご購入のユーザー様のみ)をお使いになる方は、以下のガイドの手順に沿ってインストールします。
■「Cubase LE」の場合(2024年7月以降ご購入のユーザー様のみ)
「購入製品一覧」ページからご覧いただける導入手順に沿ってインストールします。
■「Studio One Artist」の場合(2024年6月以前ご購入のユーザー様のみ)
「Studio One Artist (OEM)インストール・ガイド」に沿ってインストールします。
macOSをお使いの方向け
1.「Piapro Studio」と「VOCALOID API」のインストール

ダウンロードしたインストーラの圧縮ファイルを、任意の場所に解凍(展開)します。
「Piapro Studio」のインストーラは、解凍によって生成されたフォルダの中にある「Piapro Studio Installer.pkg」を起動します。インストールの手順は下記の通りです。
-
「ようこそ Piapro Studio インストーラへ」画面[続ける] ボタンをクリックします。
-
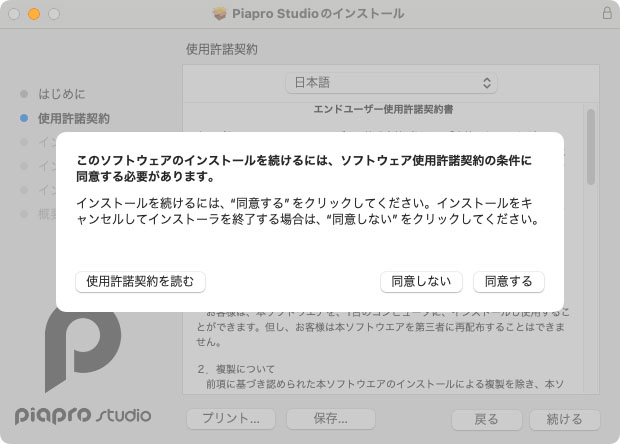 「使用許諾契約」画面使用許諾契約書の内容が確認できます。内容をご確認の上、[続ける] ボタンをクリックし、続けて [同意する] ボタンをクリックします。
 -
 「インストール先の選択」画面通常はそのまま [続ける] をクリックします。インストールが開始されます。
 -
 「インストールが完了しました」画面[閉じる] ボタンをクリックし、「Piapro Studio」のインストールを完了します。
 -
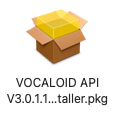 「VOCALOID API」インストーラの起動続いて、インストーラファイルの中にある「VOCALOID API V◯◯ Installer.pkg」を起動します。
 “「VOCALOID API V◯◯ Installer.pkg」が悪質なソフトウェアかどうかをAppleでは確認できないため、このソフトウェアは開けません。”というエラーが表示される場合は、「Controlキー」を押しながら.pkgファイルをクリックし、[開く] をクリックします。再度同じ内容のメッセージが表示されたら、ダイアログ内の [開く] をクリックし、続けて表示される「このパッケージの署名に使用された~」ダイアログ内で [続ける] をクリックすることでインストーラを起動できます。※今後の手順で同様のメッセージが表示された場合、再度この操作を実施する必要があります。
 -
「ようこそ VOCALOID API (V◯◯) インストーラへ」画面[続ける] ボタンをクリックします。
-
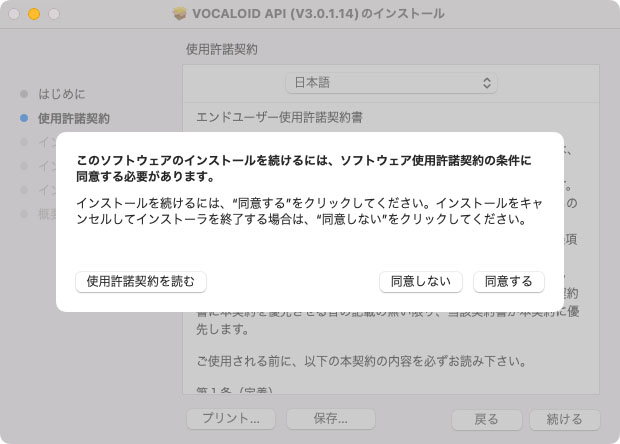 「使用許諾契約」画面使用許諾契約書の内容が確認できます。内容をご確認の上、[続ける] ボタンをクリックし、続けて [同意する] ボタンをクリックします。
 -
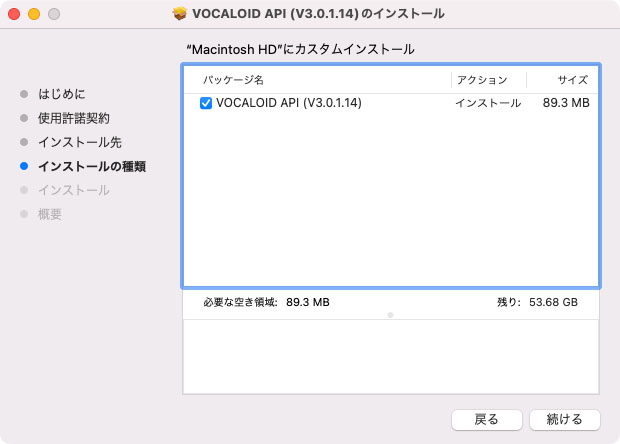 「"(ストレージ名)"にカスタムインストール」画面「VOCALOID API (V◯◯)」にチェックが入っていることを確認して [続ける] をクリックします。
 -
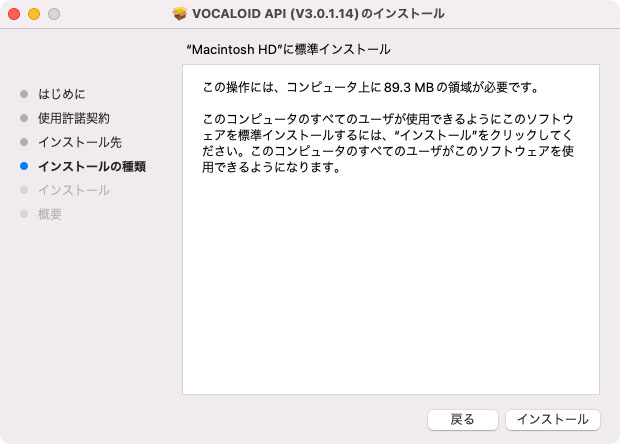 「"(ストレージ名)"に標準インストール」画面[インストール] をクリックすると、インストールが開始されます。
 -
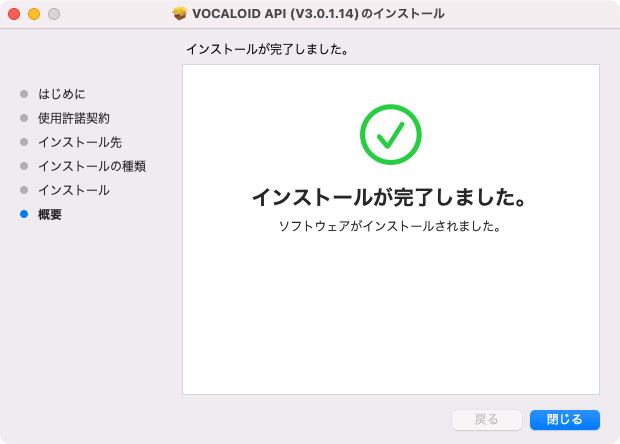 「インストールが完了しました」画面[閉じる] ボタンをクリックし、「VOCALOID API」のインストールを完了します。
次章 2. 音声ライブラリのインストール に進みます。
2. 音声ライブラリのインストール

音声ライブラリ(『MEIKO V3』など)は、解凍によって生成されたフォルダの中の dmg ファイル(以下リスト参照)よりインストールすることができます。インストールの手順は下記の通りです。
-
『MEIKO V3』の場合:VOCALOID3 MEIKO V3 Installer_n.dmg
-
『KAITO V3』の場合:VOCALOID3 KAITO V3 Installer_n.dmg
※以下の手順は『MEIKO V3』 を例に手順をご案内しますが、『KAITO V3』も同様の手順でインストールいただけます。
⚠️本章の手順のみでは導入は完了しません
本章(2. 音声ライブラリのインストール)の内容を実施いただいた後も、製品をお使いいただくために必要な手順がまだ残っています。
音声ライブラリのインストール後は、この後に続く「3. 音声ライブラリのアクティベーション(Mac)」の手順を必ず実施してください。
-
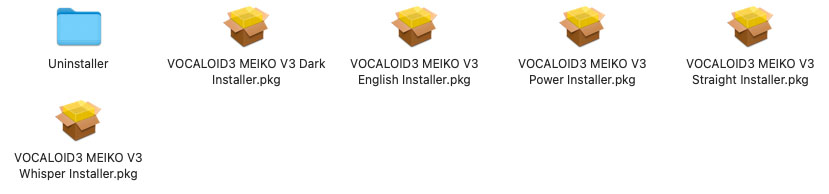 インストーラの起動「VOCALOID3 MEIKO V3 Installer_n.dmg」をダブルクリックしてマウントすると、『MEIKO V3』に収録された各音声ライブラリのインストーラが収録されています。任意のインストーラをダブルクリックしてインストーラを起動します。
 -
「ようこそ VOCALOID3 MEIKO V3 ◯◯(ライブラリ名) インストーラへ」画面[続ける] ボタンをクリックします。
-
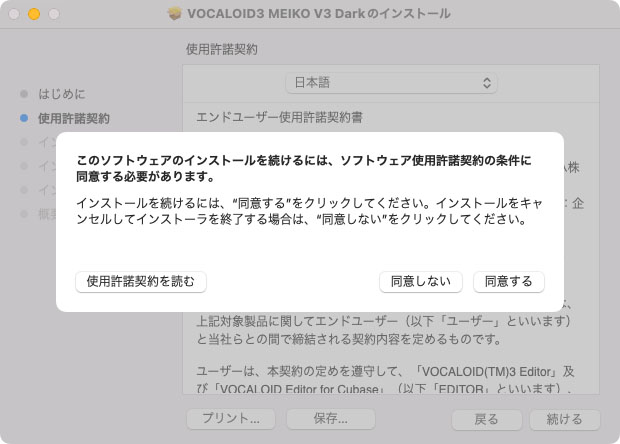 「使用許諾契約」画面使用許諾契約書の内容が確認できます。内容をご確認の上、[続ける] ボタンをクリックし、続けて [同意する] ボタンをクリックします。
 -
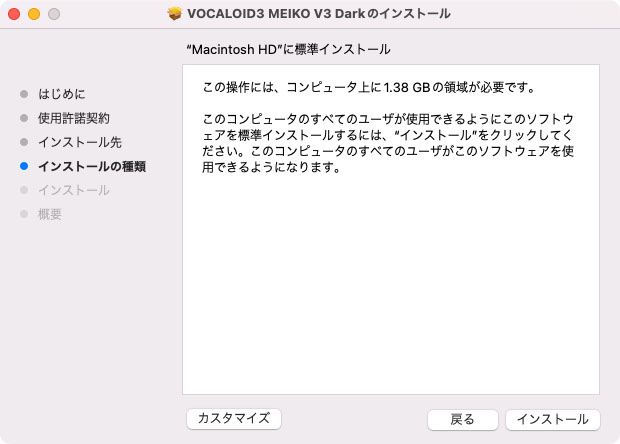 「"(ストレージ名)"に標準インストール」画面[インストール] をクリックすると、インストールが開始されます。
 -
 「インストールが完了しました」画面[閉じる] ボタンをクリックし、『MEIKO V3』のインストールを完了します。
 -
他の音声ライブラリのインストール「手順1」で開いた.dmgファイル内にある他の音声ライブラリも、手順2~5を繰り返して全てインストールします。
次章 3. 音声ライブラリのアクティベーション に進みます。
3. 音声ライブラリのアクティベーション(Mac)
音声ライブラリ(『MEIKO V3』など)をご使用いただくために、以下の手順でアクティベーション(認証)を行います。体験版をお使いの方は、こちらの手順を実施いただく必要はございません。
-
 「VOCALOID License Manager」ソフトウェアの立ち上げFinder の「アプリケーション」→「VOCALOID」→「VOCALOID License Manager」の順にクリックします。
 -
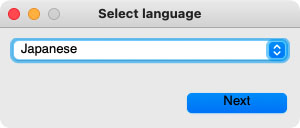 「Select Language」画面「Japanese」を選択し、[Next] ボタンをクリックします。
 -
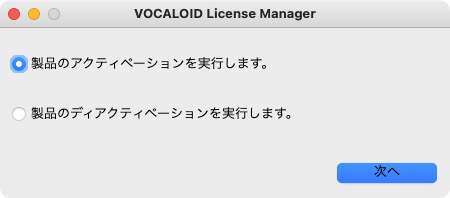 「VOCALOID License Manager」画面「製品のアクティベーションを実行します。」を選択し、[次へ] ボタンをクリックします。
 -
 インターネット接続の確認「このコンピューターはインターネットに接続されています。」を選択し、[次へ] ボタンをクリックします。なお、コンピューターがインターネットに接続されてない場合は、オフラインアクティベーションを行うことも可能です。詳しい手順は、解凍によって生成されたフォルダの中にある「オフライン・アクティベーションガイド」(PDF)をご覧ください。
 -
 「オンラインアクティベーション」画面シリアルコードを入力し、[次へ] ボタンをクリックします。アクティベーションする音声ライブラリに対応するシリアルコードを入力します。
 -
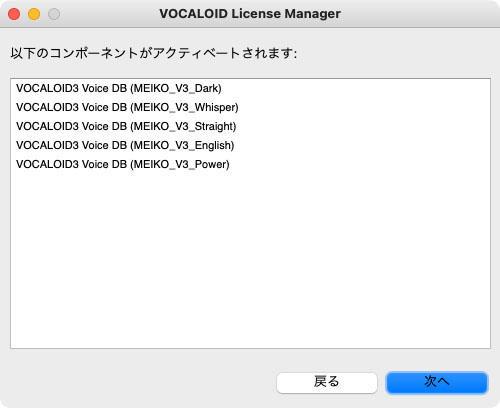 「以下のコンポーネントがアクティベートされます」画面入力したシリアルコードのライブラリが表示されていることを確認し、[次へ] ボタンをクリックします。認証時に「Error (2)」と表示される場合認証時に「Error (2)」エラーが発生する場合、YAMAHA社WEBサイトより最新の「VOCALOID License Manager」をダウンロード・インストールした上で、再度認証をお試しください。
 -
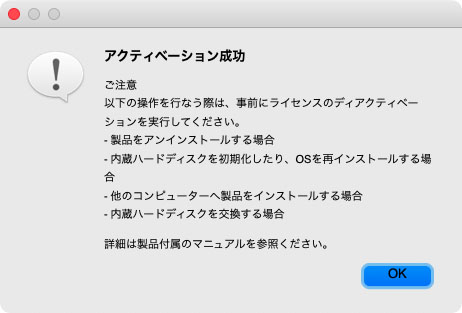 「アクティベーション成功」画面[OK] ボタンをクリックし、アクティベーションを完了します。
 -
Macの再起動音声ライブラリを使えるようにするために、macOS を再起動します。以上でPiapro Studioと音声ライブラリのインストール、及びアクティベーションは完了です。製品に付属するDAWソフト「Cubase LE」(2024年7月以降ご購入のユーザー様のみ)、または「Studio One Artist」(2024年6月以前にご購入のユーザー様のみ)をお使いになる方は、以下のガイドの手順に沿ってインストールします。■「Cubase LE」の場合(2024年7月以降ご購入のユーザー様のみ)「購入製品一覧」ページからご覧いただける導入手順に沿ってインストールします。■「Studio One Artist」の場合(2024年6月以前ご購入のユーザー様のみ)「Studio One Artist (OEM)インストール・ガイド」に沿ってインストールします。

サポート情報
製品のシリアルコードについて
シリアルコードはソフトウェアの再インストールの際などに必要となりますので、大切に保管してください。なお、シリアルコードは如何なる場合においても再発行はできません。
アクティベーションに失敗してしまった場合
アクティベーションに失敗してしまった場合は、インターネットの接続状況や LAN カードの取り付け状態、およびシリアルコードを確認します。シリアルコードは半角英数字の大文字で入力します。また他の VOCALOID 製品のシリアルコードを入力していないかもご確認ください。なおインターネットに接続しているにもかかわらずネットワークエラーが発生する場合、常駐ソフトウェアの影響が考えられます。インターネットセキュリティ対策やウィルス対策のソフトウェアだけでなく、マウスやトラックボールのユーティリティソフトウェアなどの影響によりアクティベーションが正常に行えない事例もあります。全ての常駐ソフトウェアを一時的に停止/無効化した上でアクティベーションを行ってください。
アンインストールの方法
「Piapro Studio」や「Mutant VSTi」、音声ライブラリ(『MEIKO V3』など)を再インストールしたい場合は、事前にWindowsの設定アプリ→「アプリ」→「アプリと機能」、またはmacOSの「Finder」→「アプリケーション」→「VOCALOID」→「Uninstaller」→「VOCALOID4」の中に入っているファイルより、インストールされている音声ライブラリを全てアンインストールします。
ディアクティベーション ( 認証解除 ) の方法
音声ライブラリのアンインストール、OS の新規インストール、内蔵ハードディスクや LAN カードの交換、コンピュータの買い換えを行われる場合は、事前に「Vocaloid Deactivation Tool」(Windowsのみ)、または「VOCALOID License Manager」(macOSのみ)を使って、インストールされている全ての音声ライブラリのアクティベーションを解除します。詳細は以下のページをご覧ください。
「Piapro Studio」のポータルサイト
以下の「Piapro Studio」のポータルサイトでは、「Piapro Studio」開発スタッフによる最新アップデート情報やサポート情報、便利な使い方や曲作り講座などを掲載しています。ぜひご覧ください。
SONICWIRE取扱い全製品を表示したい場合は、SONICWIREを日本語で閲覧されることをお奨めいたします。